Spring MVC using XML
1. Spring MVC Hello world example using XML configuration:
In this article, we will show the steps to implement a Spring MVC project. At first, the project is implemented without annotation. Then, we will introduce the annotations.
a. Spring MVC example without annotations:
Step 1: Configure Spring MVC project with Intellij
- Click File -> New Poject
- Select Spring MVC project
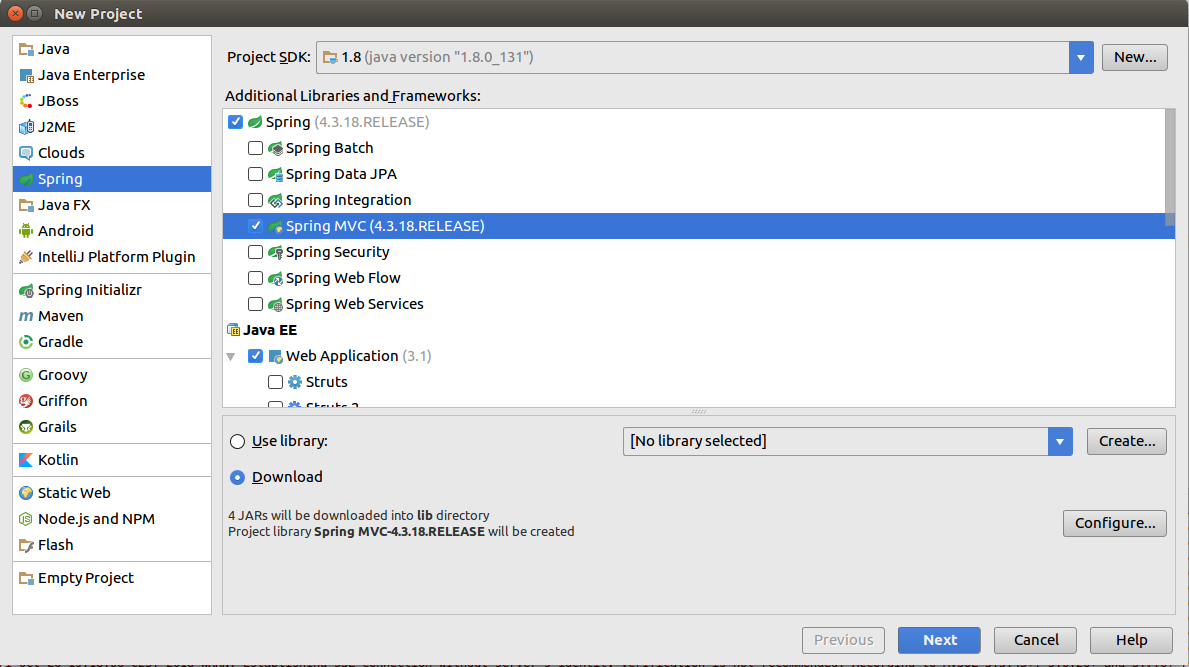
Notes:
Once the project is created, both web.xml and applicationContext.xml are created automatically.
Step 2: Modify Spring configuration file web.xml
It is created in WebContent/WEB-INF directory. it is used for mapping requests to be handled by the DispatcherServlet. If you want to customize the location and the name of the xml configuration file, you can add a ContextLoaderListener and define the information using <context-param> in web.xml.
In this example, the file applicationContext.xml (Step3) is used for customization. Otherwise, in the absence of customization the file [servlet-name]-servlet.xml located in the application's WebContent/WEB-INF directory is created.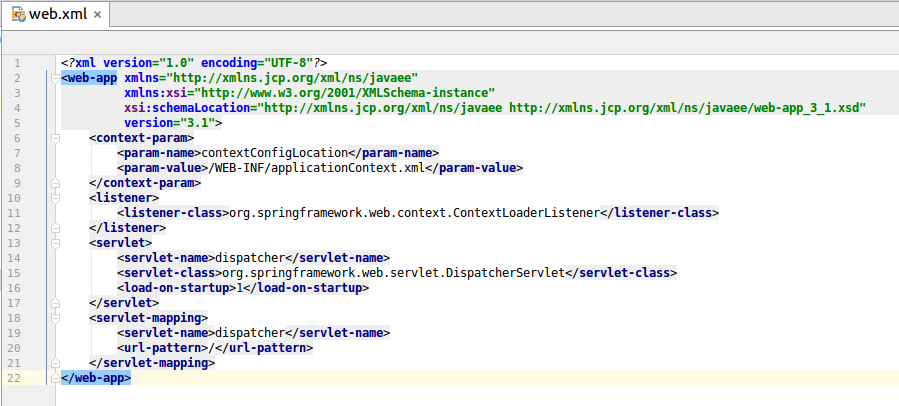
Step 3: Modify Spring configuration file
applicationContext.xml file will be used to create the beans. In this example, the bean "index" corresponding to the Controller HelloController is defined.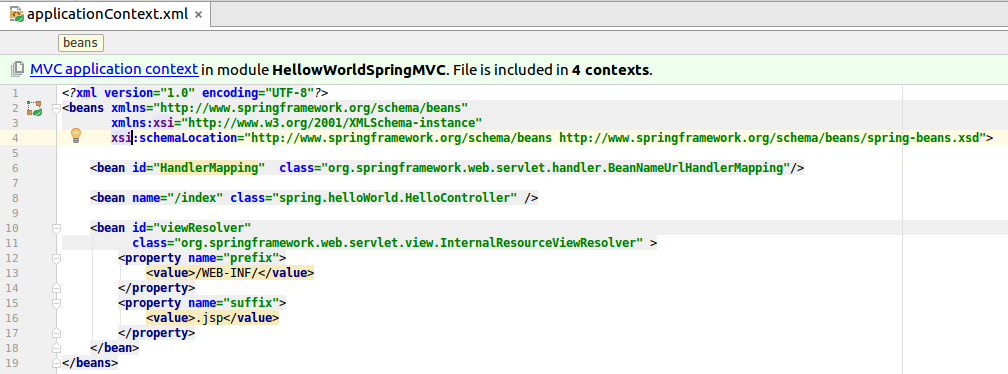
Step 3: Add Controller and View.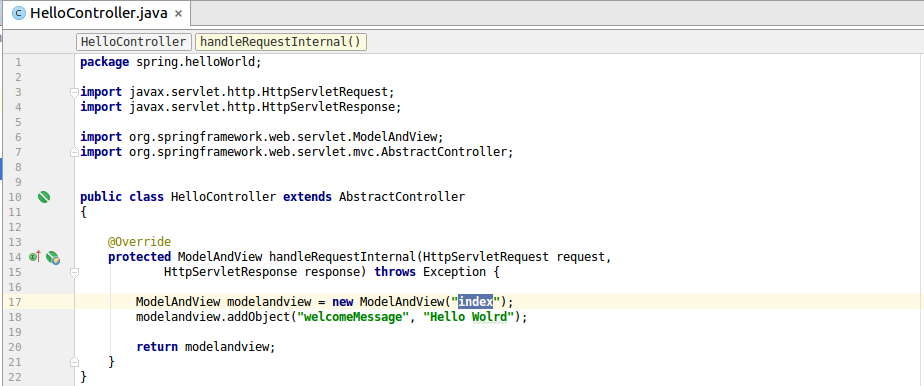
Step4: Create index.jsp file Step4: Run/Debug Configuration
In order to run the application in Intellij,
1. click run -> Edit configuration
2. Click on + button. Add tomcat Server -> Local
3. Configure Server Application then click OK
4. Click on Run. The server will be started 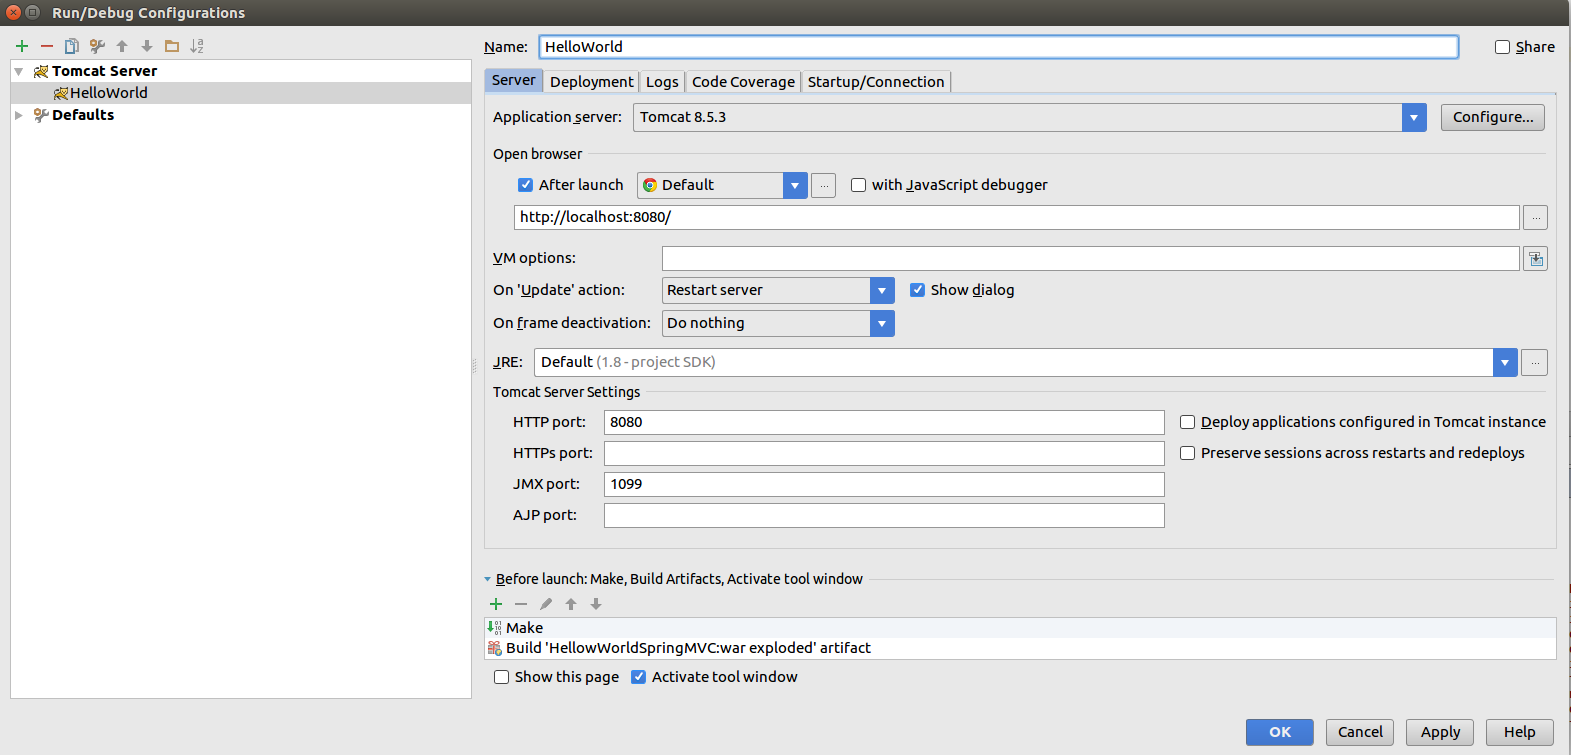
Output: 
b. Spring MVC example with annotations:ik
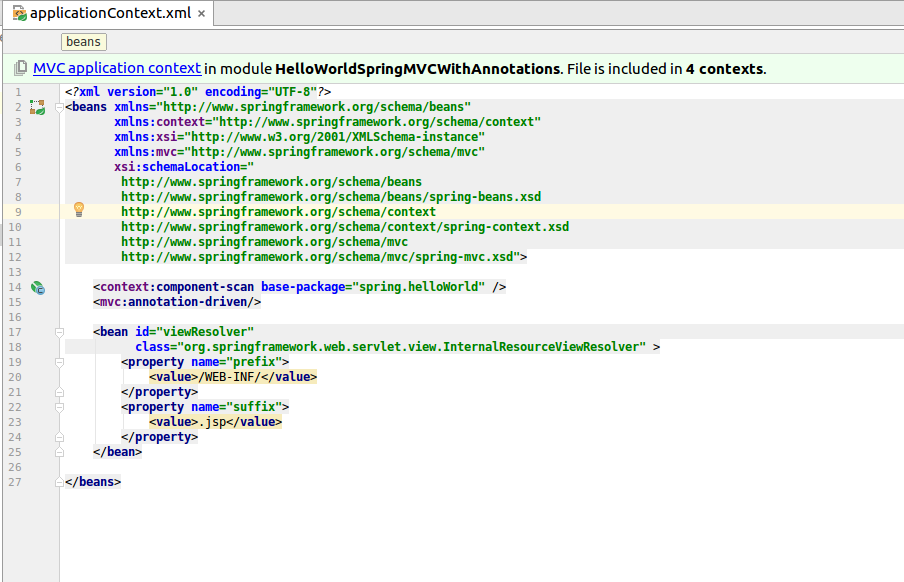
Step 3: Modify Spring configuration file
Delete the bean definition in application.xml. Only the packege of the controllers is added. <context:scan-compenent base-package="package">
Step 3: Add Controller and View.
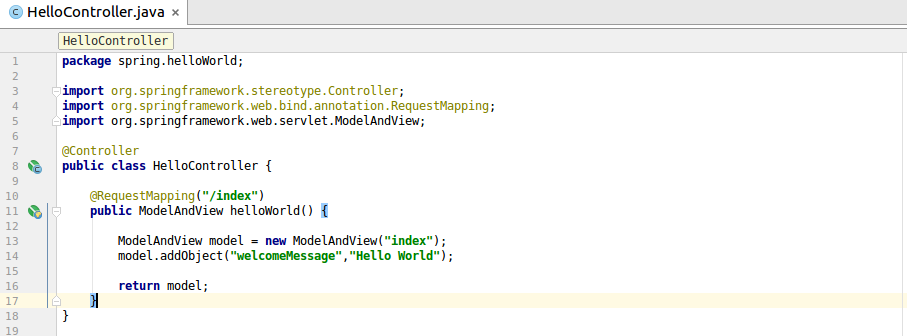
@Controller: Marks the class as a bean deleted in application.xml file.
Delete the extend of AbstractConroller in HelloController.java
@RequestMapping used to map the requests.
Notes:
1. index.jsp file should be in WEB-INF directory
2.If you get this exception in Tomcat Localhost log when you start the tomcat Server.
SEVERE [RMI TCP Connection(2)-127.0.0.1] org.apache.catalina.core.StandardContext.listenerStart Error configuring application listener of class [org.springframework.web.context.ContextLoaderListener]
java.lang.ClassNotFoundException: org.springframework.web.context.ContextLoaderListener
1. Click on File -> Project Structure
2. Select artifcats. On the right of the window under Available elements, click right on the project then select put into Output Root.
3. Restart Server.
Add a comment
